Wednesday, December 11, 2013

Personal Narrative

This was the final project created for my ARTDES176 course. The assignment was to create a personal narrative of someone, somewhere, or something special or important to us. I decided to write mine on my father. As I sat down to write, I realized that it was too difficult to sum up a person's life in one short story, so instead I chose to write about something I will always associate with him, the city of Muskegon, MI and the house we had there. The house was left to my father and his siblings when my grandparents passed away and we kept it until it sold a year ago, after my father's passing. I miss the house and the beach and I felt this was an important memory for myself and a fitting one for the assignment. I filled the page with a story, accented with an image of the house itself and scenes from the shore of Lake Michigan.


EDITED: updated line lengths


Thursday, November 21, 2013

Campbell's Soup Designs

This first typographic image uses all of the text from a Campbell's Soup can label. The only changes that were made to the font were the line spacing, size, and weight. I created a grid first that split the page in half in both directions, and then created a thick section of bars to the right of the page and a few to balance on the left. Next, I added horizontal guides of all the same thickness randomly spaced along the height of the page.

For my text I focused on emphasizing the off-setting of text against itself and the grid I created. The text to the right all varies on which vertical bar it aligns with, the center section switches which side it aligns with halfway down, and the left aligns flesh left, but then line lengths create a curve that mimics the placement of text in the center section.


UPDATE: Below is an edited form of this image. I moved the text off the edge of the page to draw the eye inward. I then created equal whitespace on both edges to balance it out.


The second image makes use of color, fonts, line spacing, size, weight, and varying the angle of the text. This allowed for more freedom to play with the image and create something I really enjoyed.


UPDATE: Below is an edited form of this image. I changed the main section color to resemble that of the soup itself and make the text easier to read. I also changed the font and moved the satisfaction guaranteed below the main white text.


This final bonus image is of my first idea for the second design. While I began a new attempt because I did not like how the additional text fit into the image, I still like it as it stands like this.


Thursday, November 7, 2013

Font Practice

This selection of textual compositions was created to emphasize the multitude of ways one statement can be expressed simply through changing the type.

There are 3 with predetermined grids and 3 where the design is based entirely off of the placements of other letters and words. The three with light gray lines show the predetermined grids.


Tuesday, November 5, 2013

Typographic Graphic

This assignment works with typography and using it in a way to express messages solely through text.

My image is created to represent the Tri-State Tornado, the deadliest tornado outbreak in U.S. history. I used the text to create a swirling impression, showing just a simple blurred fog behind it. The text is wobbly, flipped upside down in places, and varies in color and size. I used a font called "Barbatrick" that gives the impression of movement with speed to the words.


Tuesday, October 22, 2013

This is a simple map I created by using layers placed over a google maps screenshot. I chose a scene that included a variety of items to be recreated. I then traced the different elements and created a separate layer for each type (roads, water, parks, etc.) Finally, I then added map symbols to give a more official map feeling.


I have created an additional map and uploaded it to the dropbox because it has
personally identifiable information.

Thursday, October 17, 2013

Expanded Image

For this assignment we were to splice together pictures from the same scene to imply the passing of time. For this assignment I decided to use the spinning cube and wanted to allude to the idea of it spinning in time. I tried many different variations of this idea with the images I had and yet did not end up satisfied with my outcome. I have included my top two below but I am going to work to create another image for this project that I am more excited by.


The first image I created by splicing together many slices of images attempting to make the entire view spin. When I was not happy with this I instead only rotated the cube itself keeping the background stationary. 

UPDATE: Here is an additional idea that I created with Photoshop as an expanded image. These images were taken of C.S. Mott Children's Hospital at night. The front lobby has lights that slowly graduate between colors. I have an internship position with the Ronald McDonald Houses of Ann Arbor so I am familiar with this building. I used a background image of the entire building and then layered on images of smaller parts to make them brighter and emphasize the parts I wanted to stand out. I then added noise to the background image so the lights I wanted to stand out (rainbow on the left and the beautiful towers on the right) would stand out sharp and crisp. 


Thursday, October 10, 2013

Caricatures

For this in class assignment we were to create at least 4 caricatures of our family tree. I created my mom, sister, and I, and then added additional images of our two cats.


Tuesday, October 8, 2013

Continued work with Illustrator

For this exercise we created vector art in the form of a clock. I created mine with the use of ellipse and line segment drawing tools and then made use of the rotate function and various fill colors.

UPDATE: Here is an updated version I created of a more detailed clock.

Tuesday, October 1, 2013

Introduction to Illustrator


For this exercise we created an organizational chart in Adobe Illustrator. By using tools such as square, line, text, and drop shadow I was able to create a standard org chart - with my own bit of flair.


Friday, September 27, 2013

Altering Reality

For this assignment I decided to place my face into the movie poster for V for Vendetta as Natalie Portman. I have been told that I look similar to her by friends and strangers alike so I thought it would be an interesting experiment to place my face into a picture of her and see how similar we looked in the same context.

Below is the original image, with my edited image directly to the right.


For this image I first selected the area of Natalie's face and after taking a photograph of myself in light as similar as I could to hers, I cut a portion out of my face and pasted it into the selection I created. I next adjusted my face image's color balance. Finally to smooth the edges of my face and blend thm with her skin I used the eraser with a low opacity to get shadows from the original image to pop through to my face and then used varying amounts of the smudge, burn, and clone tools to fix any imperfections. All that was left then was to add the new names to the image. I replaced both actors' names so my own would not stand out as too crisp. I accomplished this by adding text boxes to a new layer and rasterizing them to the image.

As for how similar we actually look I will leave that opinion to the reader...


UPDATE: I further increased the highlights on my face to match those on the original poster. Below is the improved image.

Thursday, September 19, 2013

Photographic themes - Objects in a place out of place

For portion 2 of the photographic exploration I chose a bouquet of flowers as my object and explored the theme of replacing water with flowers. The following items showcase flowers as pouring from a pitcher while watering other plants, gushing from an outdoor spicket, bathroom sink, and bathroom shower, and finally flowing out of a gutter on the side of a brick house.


I swapped the places of these two items, as it is usually water that feeds the plants, but instead placed them into a position as to become their own life-source.

Photographic Themes - One landscape, 4 interpretations

For this assignment I chose a theme of nature shots. I took a photo emphasizing each of the four aspects of deep space, light and shadow, vantage point, and color and tone. I enjoyed this assignment greatly and even decided to throw in a few shots that did not expressly work for these themes but I thought fit other categories of shots. The following photographs were taken in the Arboretum in Ann Arbor, MI during the month of September.


Deep Space

This image was taken of a small brick and stone building on the property. I like it for deep space because the end of the building is right at the edge of the photograph and yet the angle this photo was taken at makes it seem as if this is a brick wall that continues on indefinitely.


 Light and Shadow
 

I chose two photographs to emphasize light and shadow. The first image emphasizes light and shadow by showcasing a shadow as the focus of the image rather than the light as usually emphasized in light vs. dark contrast photographs.  The second catches the light in a way as to frame the leaves to the right in sunlight, and highlight shadows of other leaves on top of more below.

Vantage Point
This image shows a detailed version of the bark, the part usually not focused on for tree photographs. I also found after I uploaded this image that there is writing on the tree I did not previously notice, and yet the vantage point is angled so as to make it impossible to read...

Color and Tone
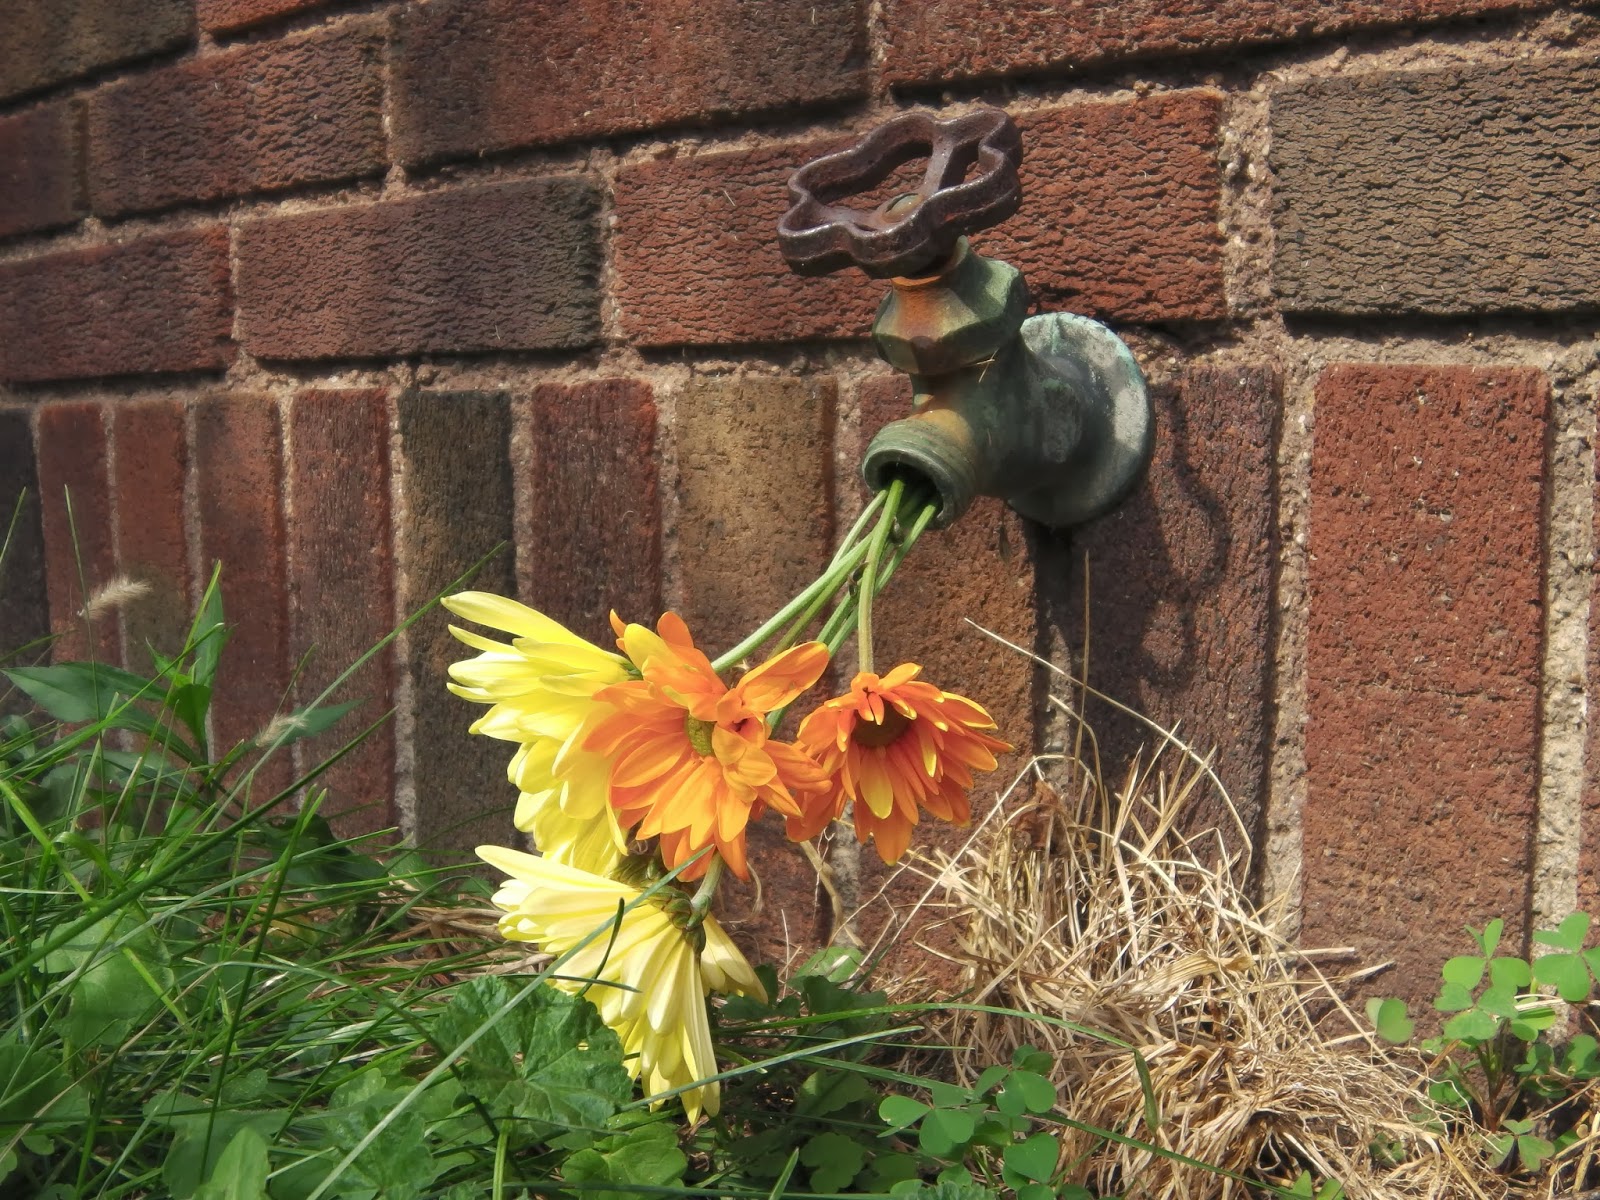
This photograph at first looks like a color emphasizing simply the vibrant colors of the plants, but look again and the colors of the small beetle perched on a flower begin to pop. Looking closer, although the colors looks bright and colorful from afar, upon further examining of the petals they are in reality beginning to brown and slowly being eaten away. Although beginning to crumble up close, it appears beautiful from afar.


The following were taken during my photo shoots and I enjoyed their outcome so much I decided to include them as extra items below.

Framing
This was probably my favorite image that I took for this project. The bulk of the tree is framed and blurred out of focus behind that of a single one of the leaves.

 Focus
In this image, although the bird is the brightest item in the photograph, and largely the focus of the image, instead the focus is on the single plant stalks that come up in front creating an interesting depth of field.
Cropping

This image was discovered as I worked in another window and this view of the photograph was seen peeking around the other window. It made for an interesting visual contrast between the triangle sliver of tree and green foliage behind.


Tuesday, September 17, 2013

Sketch Creation


This photograph was edited to resemble a hand-drawn sketch rather than a digital image. By following the sketch-effect tutorial by Photographish I was able to create the illusion of a hand drawn sketch on canvas, flattening the colors to black and white and then layering that over a light gray/tan backdrop.

Photo Retouch


This photograph was retouched to colorize a black and white photo in portions. I added color to her lips, eyes, hair, and cheeks through the use of layers.

The color adds a unique feel to the photograph, bringing life and interest into small segments of the photograph.

Graduated Color


This photo was taken in July of 2013 of the Washington Monument in Washington D.C. 


I used the gradient technique to create a graduated color change in the photograph. First the image was converted to Grayscale, the into a Bitmap form. After returning the photo to Grayscale and then back to RGB form I was able to use the gradient tool to create this effect.

The colors in the monument blend from the patriotic colors of red to blue, with some white peeking through in the sky above. To create this red to blue effect, the colors passed through a deep purple as well, however briefly.

Tuesday, September 10, 2013

Simple Photo Adjustment


This original photograph is of the Stone Arch Bridge over St. Anthony Falls on the Mississippi River in Minneapolis, Minnesota. 


The resulting image above was edited in Adobe Photoshop using the image adjustments of curves, exposure, levels, Hue/Saturation and Channel Mixer. I also used the Magic Wand to select portions individually to adjust and fill.

This photograph emphasizes the dark colors of the metal and stone components in the industrial setting of the bridge and buildings surrounding the river, in stark contrast with the bright sky overhead and rushing waters of one of the few remaining natural waterfalls of the Mississippi.